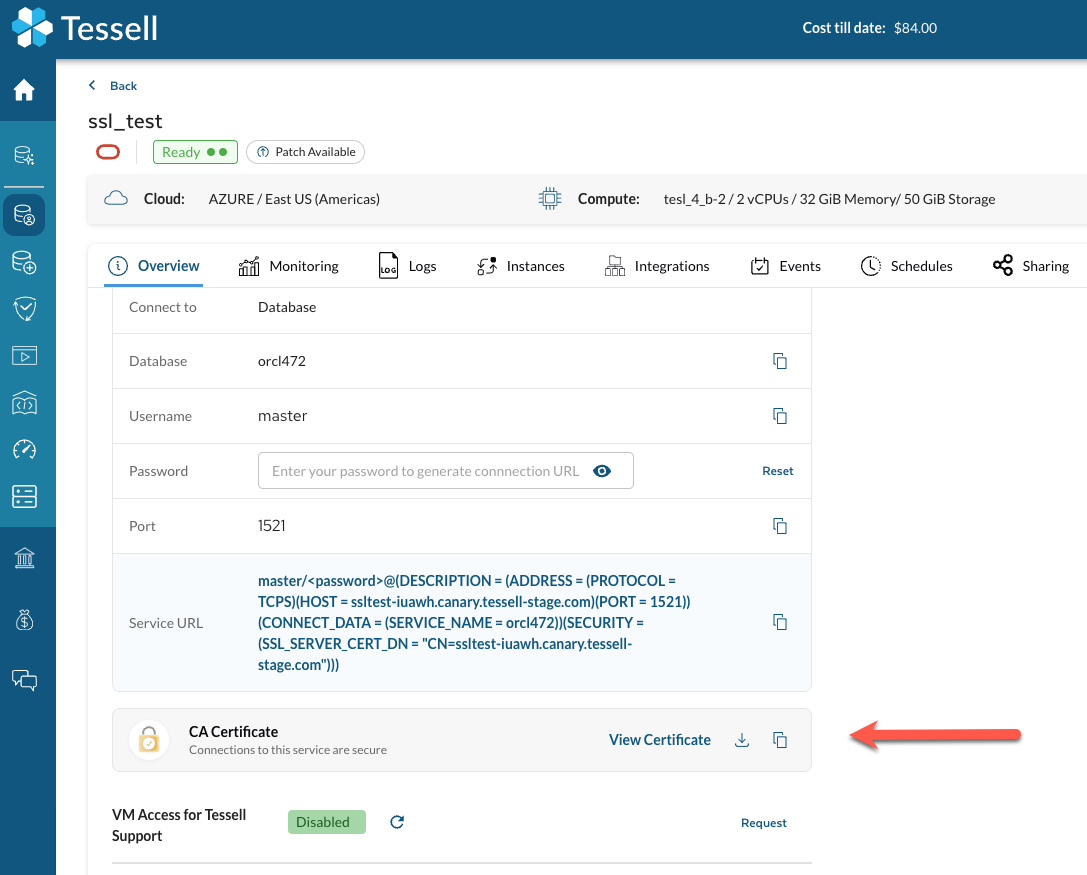
Figure 1 — Downloading the CA certificate from the service Overview page
*** ## Step 2 — Install the Oracle Client Ensure the Oracle Client is installed on your Windows machine. At a minimum you need: * `sql*plus` — for connecting to the Oracle Database * `orapki` — for certificate wallet management The easiest way to get all tools is via the **Oracle Universal Installer (OUI)** selecting the **Administrator** profile. You can also use **Oracle Wallet Manager**, a graphical utility that performs the same wallet operations as `orapki`. > See the [Oracle Help Center](https://docs.oracle.com/cd/E24628_01/em.121/e37799/ch1_introduction.htm#OUICG107) for OUI installation guidance.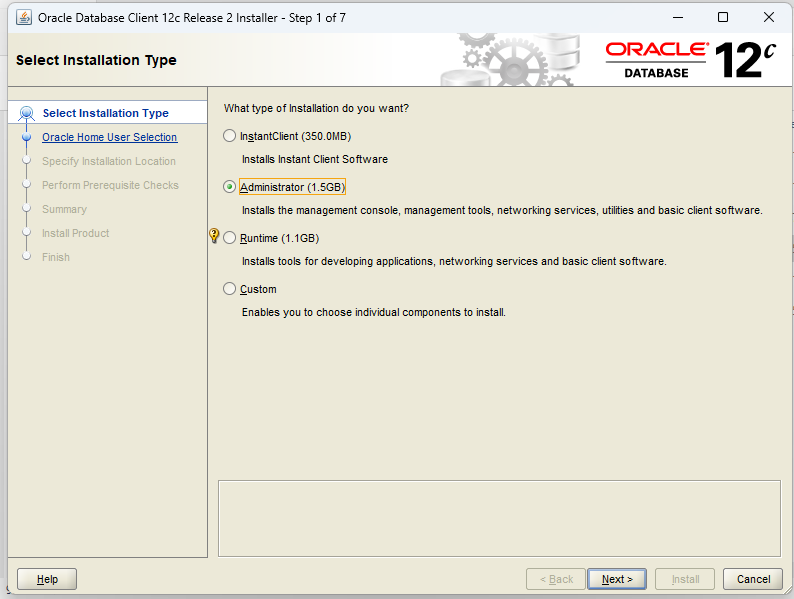
Figure 2 — Selecting the Administrator profile in Oracle Universal Installer
*** ## Step 3 — Configure Oracle Net for SSL/TLS Edit `sqlnet.ora`, located in `$ORACLE_HOME/network/admin`, to point Oracle Net at your wallet: ``` WALLET_LOCATION = (SOURCE = (METHOD = FILE) (METHOD_DATA = (DIRECTORY = path_to_your_wallet))) SSL_CLIENT_AUTHENTICATION = FALSE SSL_VERSION = 1.2 ``` > These are the minimum settings. You can also configure allowed cipher suites and other SSL parameters — refer to the Oracle documentation for advanced configuration. > > The database listener must already be configured to accept SSL/TLS connections. If you do not have an existing wallet, proceed to Step 4 to create one. *** ## Step 4 — Create an Oracle Wallet and import the certificate Oracle uses a Wallet to store trusted certificates. Use either `orapki` (CLI) or **Oracle Wallet Manager** (GUI). ### Option A — Using `orapki` (command line) ``` orapki wallet create -wallet path_to_your_wallet -auto_login orapki wallet add -wallet path_to_your_wallet -trusted_cert -cert your_certificate.crt ``` Replace `your_certificate.crt` with the path to the certificate downloaded in Step 1. If you already have a wallet, skip the `wallet create` command. > **Important:** The `-auto_login` flag lets the driver access the wallet without a passphrase. Without it, the driver will fail to open the wallet file. Ensure OS permissions allow the user or service account to read the wallet files. ### Option B — Using Oracle Wallet Manager (GUI) 1. Open Wallet Manager. Use the left menu to create a new wallet or open an existing one.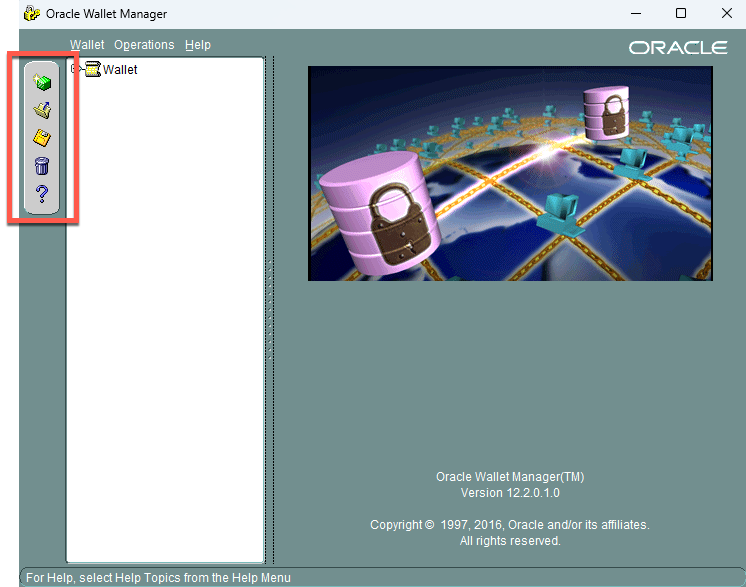
Figure 3 — Oracle Wallet Manager home
2. Enter a passphrase that meets the specified requirements when creating a new wallet.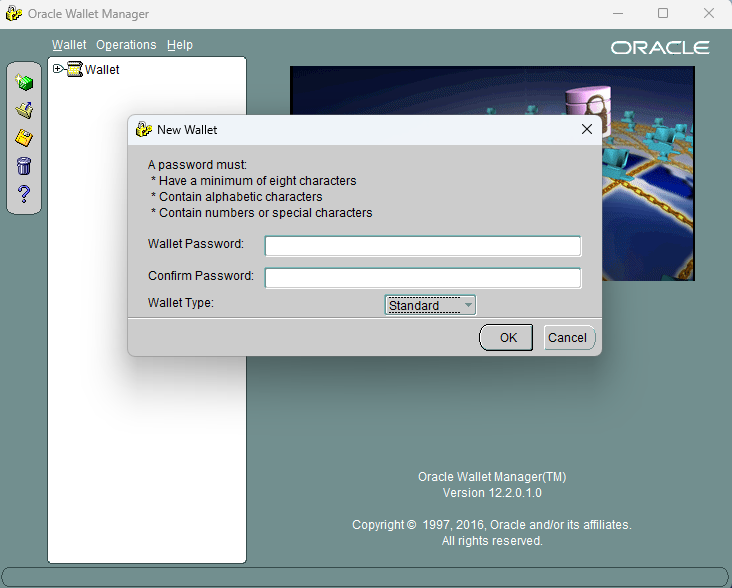
Figure 4 — New wallet passphrase dialog
3. When prompted to create a certificate request, select **No** — you need to import the Tessell certificate instead.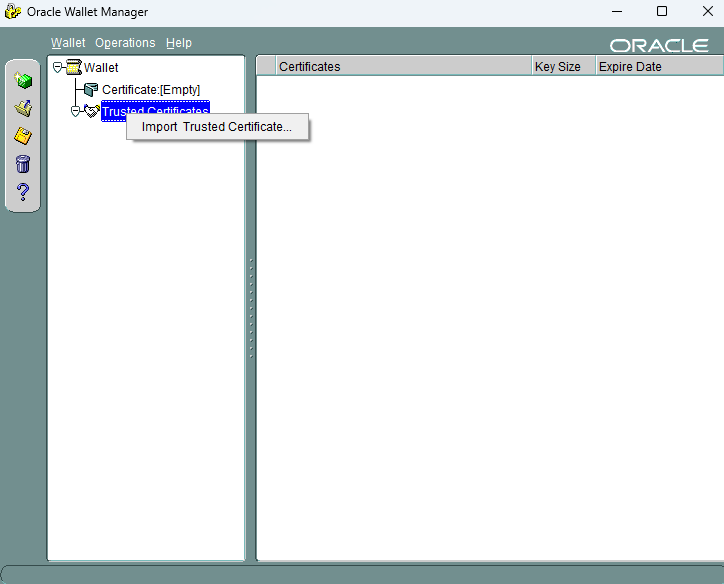
Figure 5 — Declining the certificate request prompt
4. Browse to the directory containing the certificate file downloaded from Tessell and import it.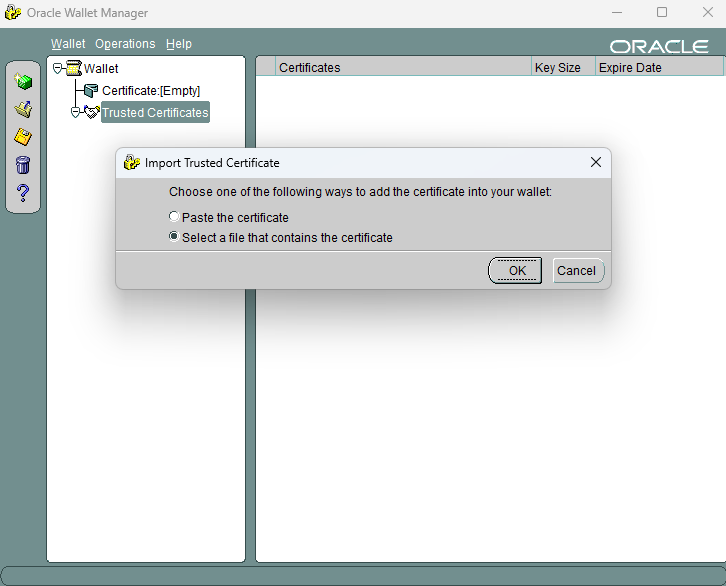
Figure 6 — Selecting the Tessell CA certificate to import
5. Confirm the certificate appears in the wallet.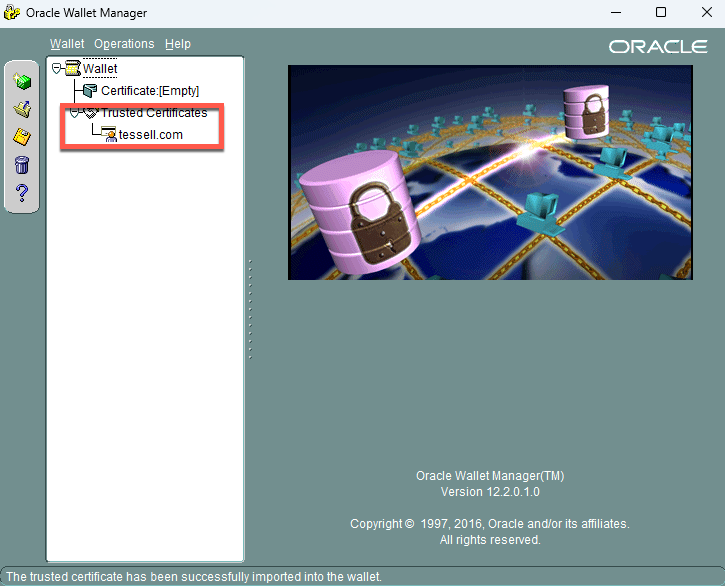
Figure 7 — Certificate successfully imported into the wallet
6. Save the wallet to the same directory you configured in `sqlnet.ora` in Step 3.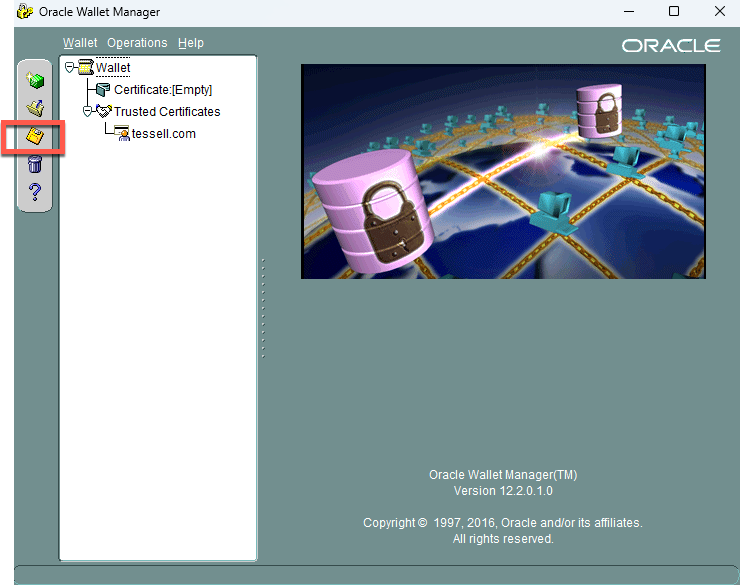
Figure 8 — Saving the wallet to the configured directory
7. Enable **Auto Login** for the wallet. The setting is saved automatically once selected.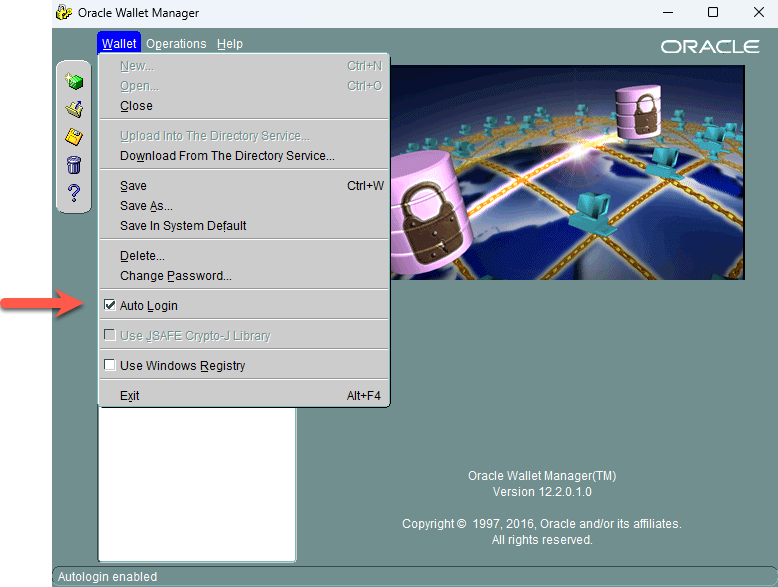
Figure 9 — Enabling Auto Login in Wallet Manager
*** ## Step 5 — Connect using SQL\*Plus Use SQL\*Plus with a TCPS connection string. The Tessell service Overview page provides a pre-configured connection string as a starting point. You can also add a TNS entry to your `TNSNAMES.ORA` file: ``` MYDB_SSL = (DESCRIPTION = (ADDRESS = (PROTOCOL = TCPS)(HOST = your_db_host)(PORT = your_ssl_port)) (CONNECT_DATA = (SERVICE_NAME = your_service_name) (SSL_SERVER_CERT_DN = "CN=mydb.service.com") ) ) ``` Replace `path_to_your_wallet`, `your_certificate.crt`, `your_db_host`, `your_ssl_port`, `your_service_name`, and `mydb.service.com` with your actual values.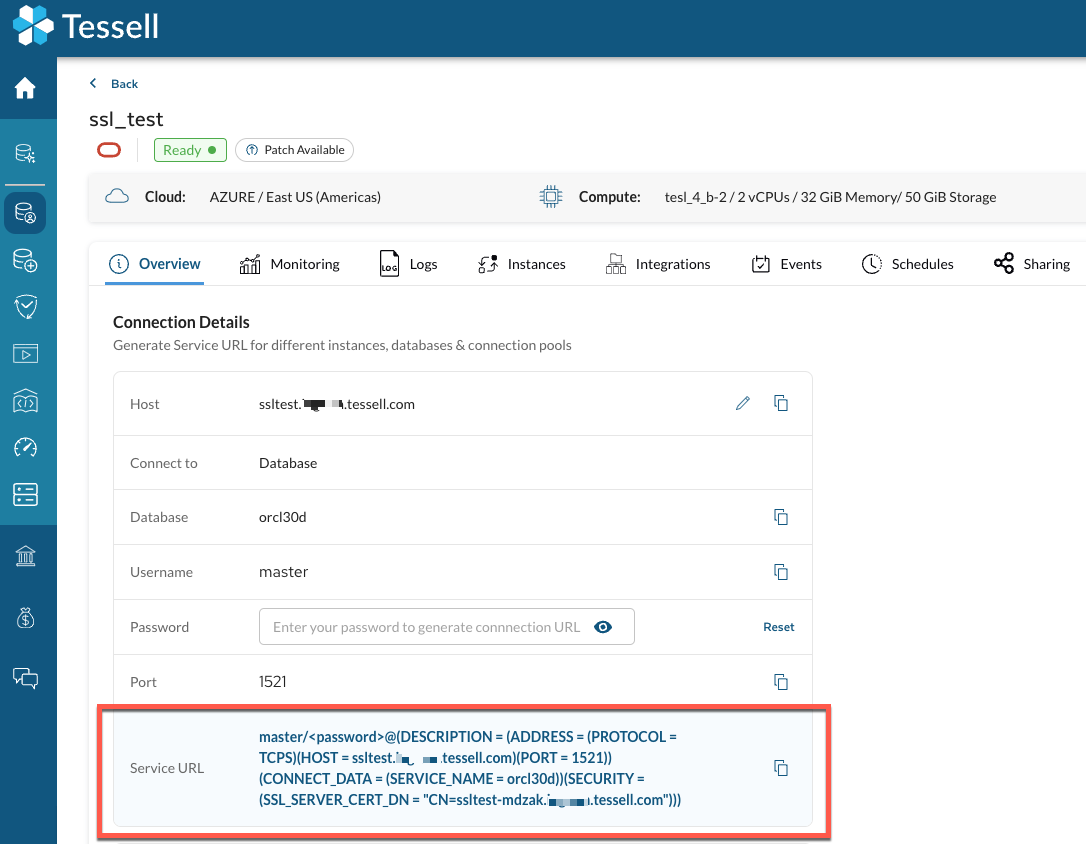
Figure 10 — Pre-configured connection string on the Tessell service Overview page
*** ## Additional notes * The steps above may vary depending on your Oracle Database version and network environment. * Refer to Oracle documentation specific to your version for detailed SSL setup instructions, as there may be version-specific requirements. --- # Agent Instructions This documentation is published with GitBook. GitBook is the documentation platform designed so that both humans and AI agents can read, navigate, and reason over technical content effectively. Learn more at gitbook.com. ## Querying This Documentation If you need additional information that is not directly available in this page, you can query the documentation by asking a question. Perform an HTTP GET request on the following URL with the `ask` and `goal` query parameters: ``` GET https://docs.tessell.com/tessell/database-engines/tessell-for-oracle/database-connections-using-ssl-tls/windows-platform.md?ask=